In the previous article we developed a stock prices WebService using docker containers. This service used the Refinitiv RTSDK and the Spring framework for actual REST heavy lifting. An reasonable next step would be to deploy this WebService on a cloud platform where it can be scaled upon demand. In this article, we explore - in pictures, how to deploy this WebService on the Amazon Elastic Container Service (ECS). AWS is only used as one of the examples here - all major cloud providers offer a similar container deployment and orchestration service.
Deployment steps
AWS ECS offer two deployment options - EC2 and Fargate. Since we are interested in simple cloud centric solution and minimal management overhead, we can choose Fargate - where all the aspects of container life-cycle etc are managed for us. The key steps required for deployment are:
Prerequisites:
- Have access to Refinitiv market data service in cloud.
- Prepare a docker image with our Pricing Web Service. This is done in the previous article.
Deployment steps:
- Create an Elastic Container Registry (ECR) which will hold our Docker image.
- Tag our local Quotes WebService image with ECR tags.
- Push the tagged image to ECR as a private repo.
- Create an application task definition.
- Configure the service parameters like name, number of concurrent instances, security and load balancing.
- Launch the service.
Optional steps (not performed in this article)
- Integrate logs and alerts with AWS CloudWatch.
- Scale dynamically based on web service load.
Step-by-step pictures
Let us walk through these steps one by one.
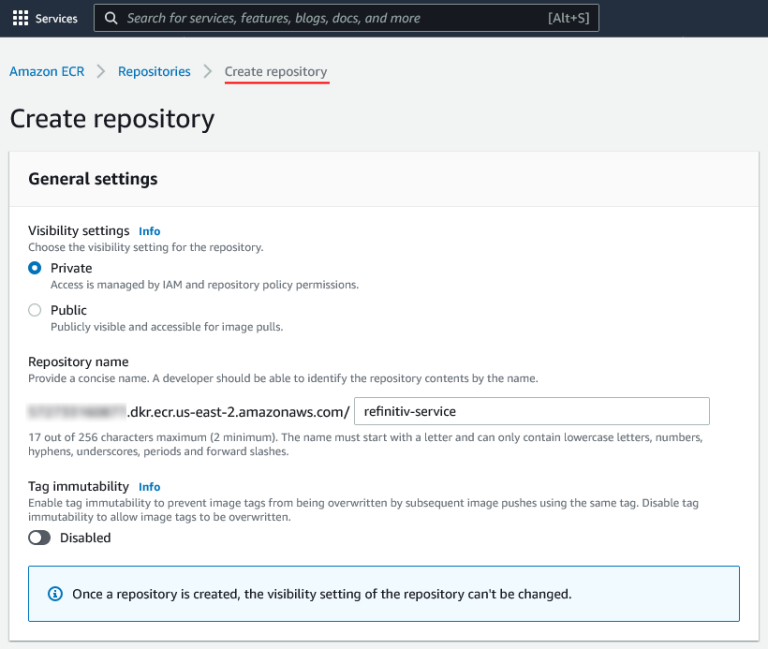
From AWS home page, select ECR and create a registry to hold the docker image and provide a valid repo name to your repository:
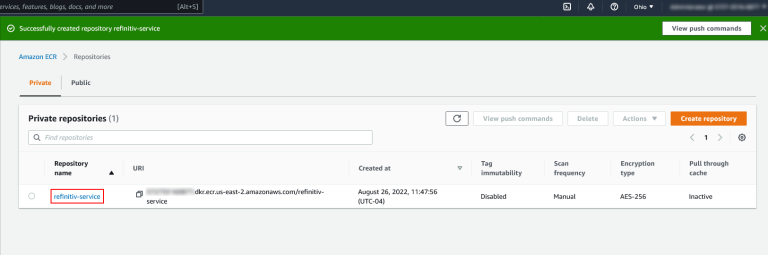
Once this repo is created, it will show up in the private repositories list:
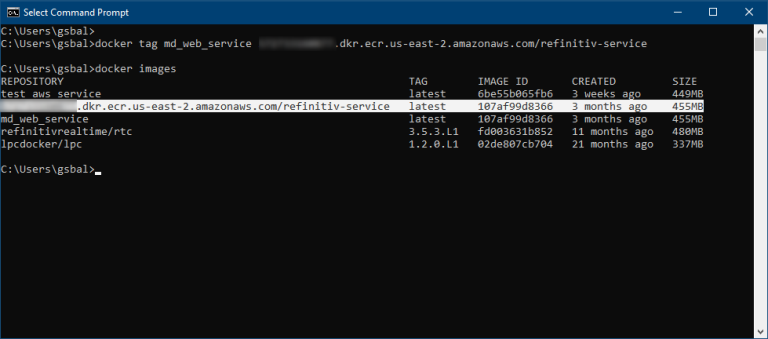
Now we can "Tag" our local Quotes-WebService docker image with this newly created ECR repo name:
docker tag md_web_service xxxxxxxxxxxx.dkr.ecr.us-east-2.amazonaws.com/refinitiv-service
The tagged image has the ECR repo name:
Use our AWS credentials from the CLI, and push the renamed local image to the remote repo:
docker login -u AWS -p $(aws ecr get-login-password --region us-east-2) xxxxxxxxxxxx.dkr.ecr.us-east-2.amazonaws.com
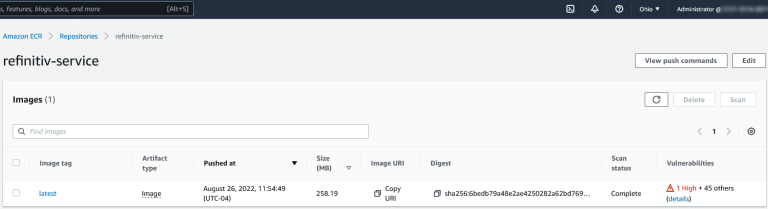
We can navigate to the ECR page and see the newly uploaded image. In a production setup the vulnerabilities in the dependencies would be addressed:
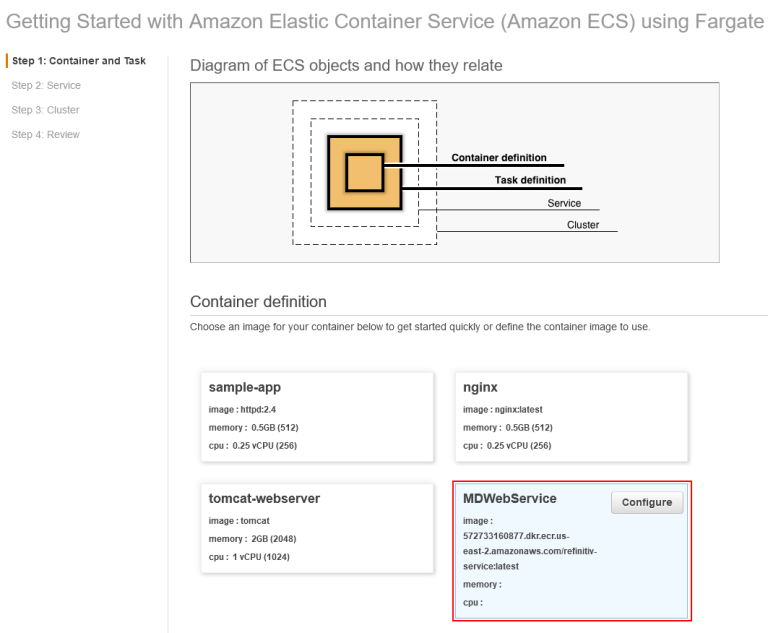
Now we will create an Application Task Definition. In the ECS First Run configuration page, select the custom definition and fill in the uploaded repo name:
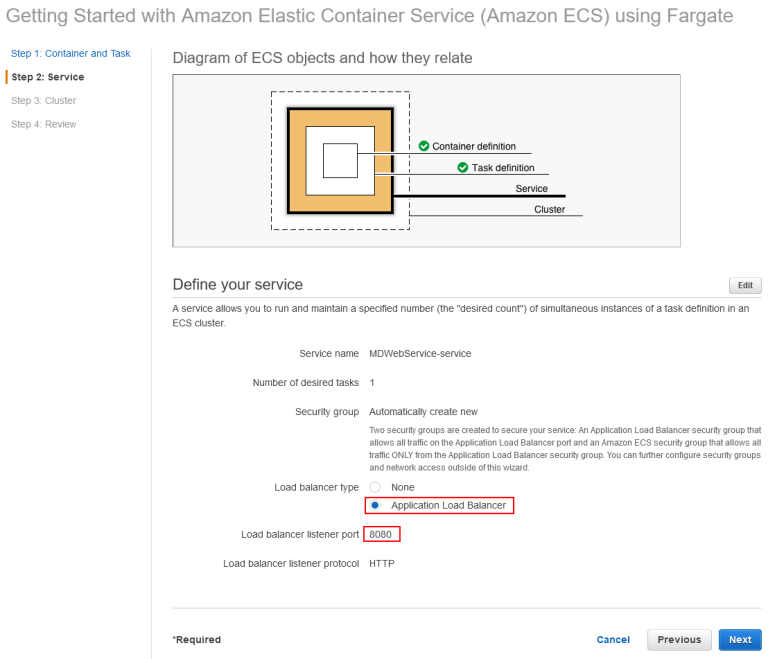
Next, we define the service. We choose application load balancer which directs traffic to HTTP port 8080, which is the REST service port exposed in our image:
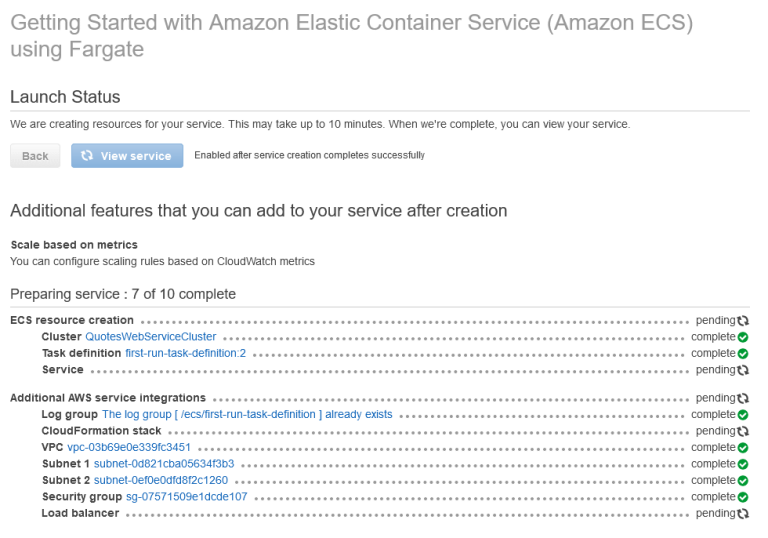
Once the default values have been selected for the cluster, click create which will set off the process of creating our task:
We need to modify the security group to allow inbound requests to reach our web service. For this, go to the newly created service status:
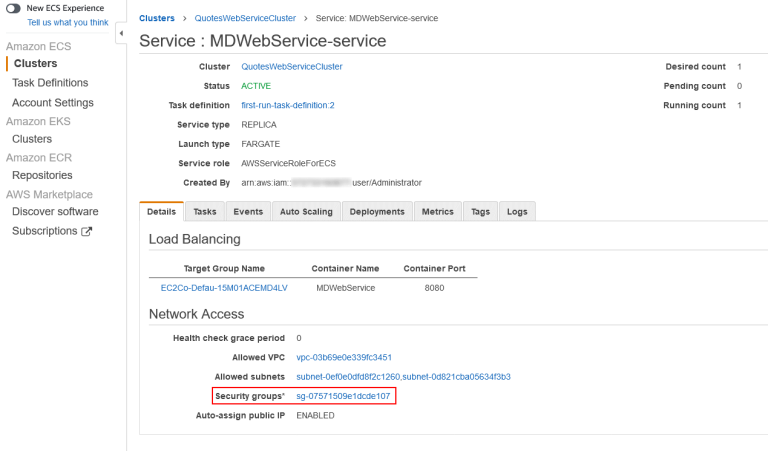
And click on the Security Group associated with it, and edit the inbound rules to allow HTTP requests from internet to get to the service:
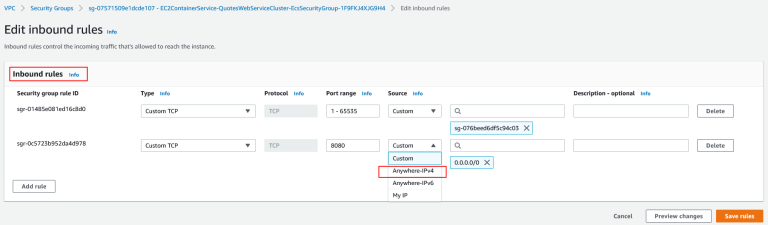
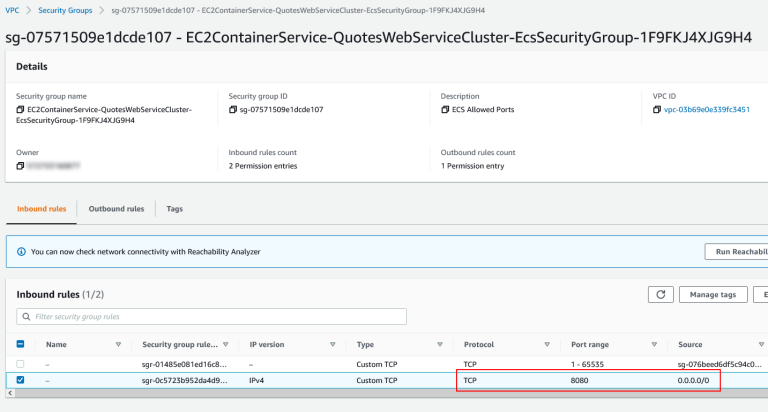
Once complete the Security group will appear like this. This one is allowing traffic from anywhere on the internet; in a production setup, we would restrict the list of allowed IP addresses:
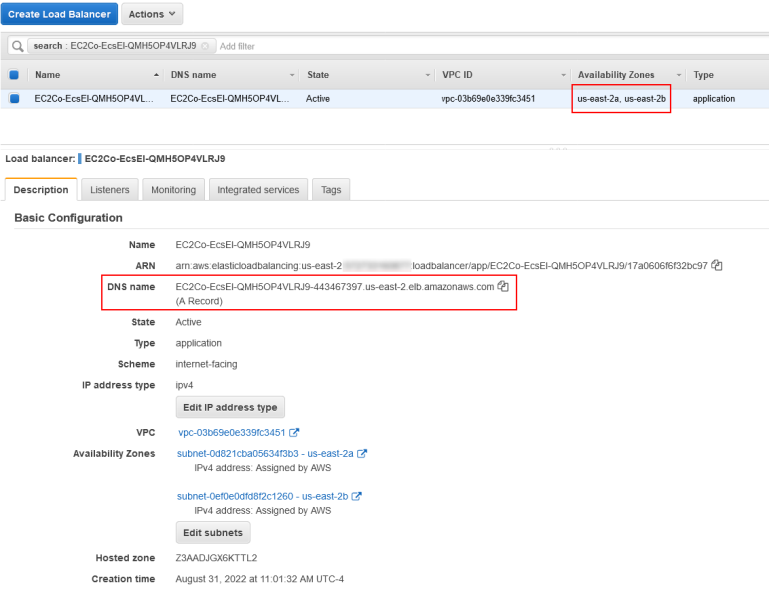
The service load balancer shows that the service is active in two AWS availability zones:
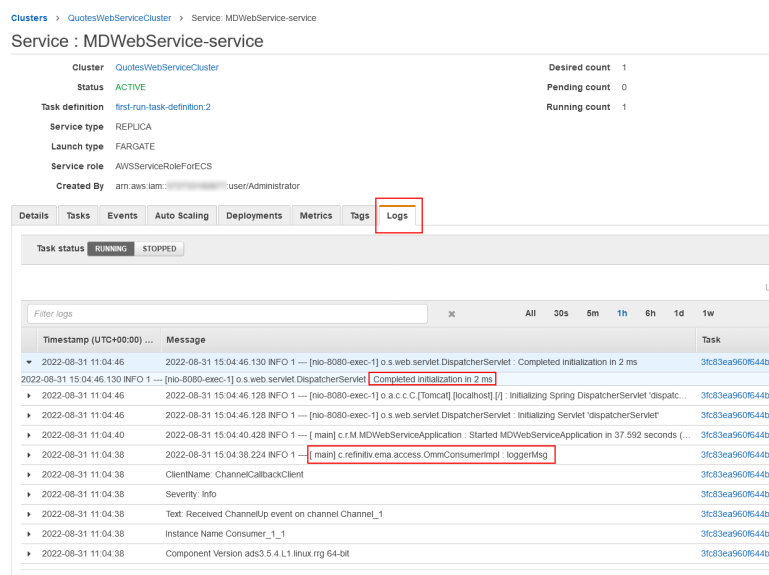
Now we can check the logs under the service status to see if our application is having issues starting up:
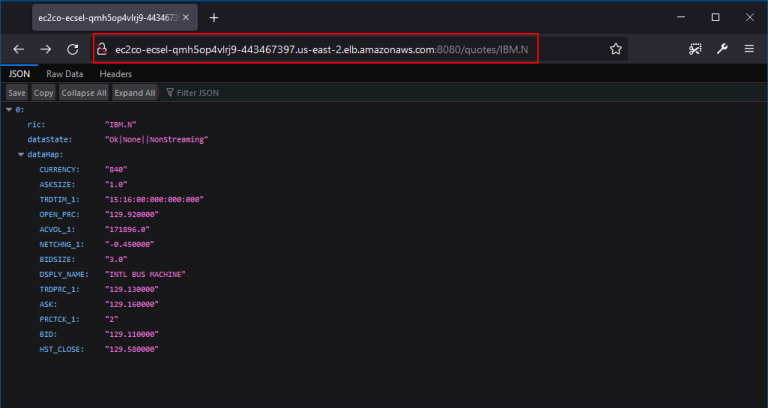
Once the service has started up, we can now point the web-browser to the public DNS of our load balancer and request the quotes:
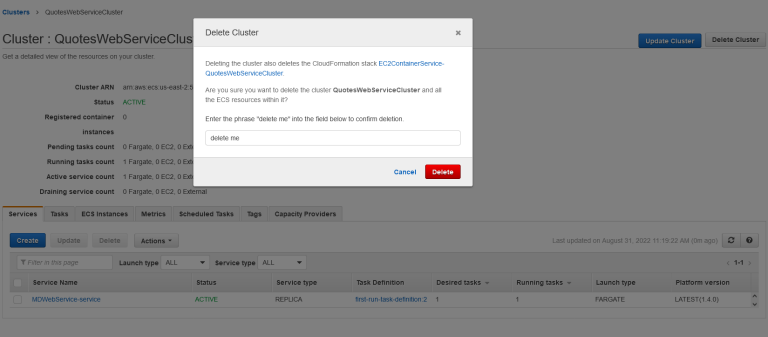
Once finished testing, we can delete the WebService cluster as well as any private repos, to avoid continued billing: