


Knowledge Prerequisite
- working knowledge of developer tools, Refinitiv RT-SDK and basic Linux + Windows command line usage
- some experience in developing with Refinitiv Streaming APIs such as EMA, ETA, Websocket API
- basic knowledge of Google Cloud Platform console
- basic knowledge of Docker
Summary - In this article, I will detail the steps required to run the Refintiv Real-Time connector component and Real-Time SDK inside a GCP Compute Engine using Docker
Introduction
Towards the end of 2021, I published a 2 part article titled 'Testing Real-time Streaming applications with Docker & Refinitiv Real-Time Connector' - which detailed the steps required to install, configure and run the Refinitiv Real-Time Connector (simplistically speaking a cut-down Refinitiv Real-Time Distribution system in a single application) and our Real-Time SDKs on a local PC using Docker.
A colleague in a different team - Douglas Mc Kinley - took the article one step further and decided to replicate the setup using a couple of GCP Cloud Compute VMs - one for the RTC and one for the RT-SDK.
In his words (with some summarizing on my part!):
'I wanted to run the RT-SDK examples from Docker as well - whereas in your setup they were running on your local machine. I soldiered on and got the RT-SDK running on Docker as well - although I had some issues around the whole docker networking thing since both containers existed separately and had no idea of the other.
That got me thinking - could I move everything onto the same network from the start? So my next iteration was to move everything off my local PC and into the Cloud, GCP to be precise. The goal was to move everything into GCP with no connection whatsoever to my local machines. The beauty of GCP is that all VMs are created on the same default network – unless otherwise stated. And all VMs can see any internal IPs on that network. So there is no need to care about local hosts etc. And it works fine. No local machine dependencies or installs. And access to cheap-as-chips CPUs on GCP.'
Douglas kindly agreed to share the steps he performed - allowing me to share them with the wider audience of this Developer Portal. What follows below are Douglas' instructions with some tweaking and clarifications on my part.
Step 1 - Creating a GCP Virtual Machine for RTC
Via the GCP Console, Compute Engine section, create a VM instance - choosing the standard E2 series e2-medium Machine configuration. Give it a name like rtc-1 or similar
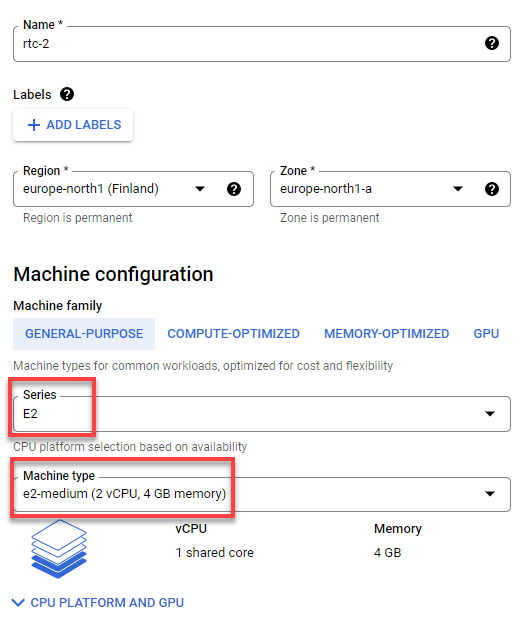
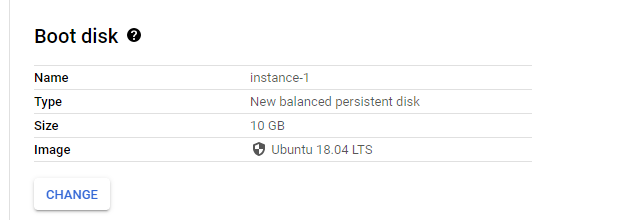
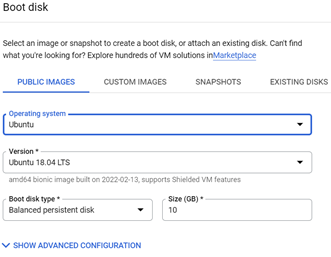
From the Boot Disk section select the Ubuntu 18.04 TLS. - purely because this version seems to works well with Docker, Docker Compose etc.
You can leave the rest of the main Machine Configuration selections as the default values.
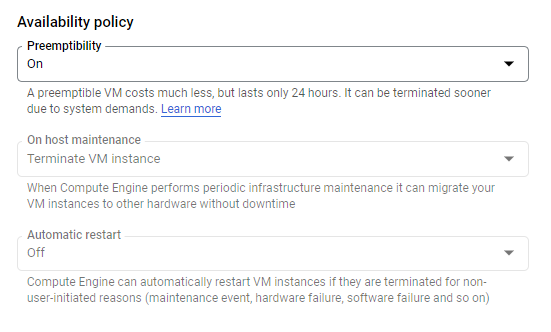
However, under the MANAGEMENT->Availability policy section, you can set Preemptibility to On - if you wish to keep your GCP costs low.
Click the CREATE button.
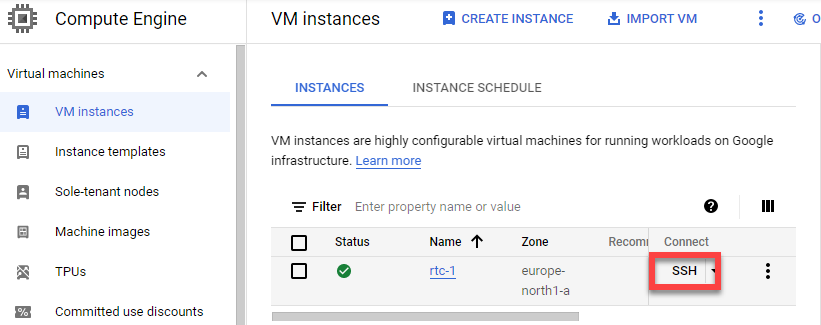
Once the VM is up and running, from the VM Instances list, click the SSH link on your rtc instance to open a shell and proceed with Step 2 below
Step 2 - Installing Docker Engine on Ubuntu using the Repository
Full installation instructions are available at https://docs.docker.com/engine/install/ubuntu/.
Nevertheless, each key step is detailed below:
From the Ubuntu Command Line confirm Docker is not previously installed:
$ docker --version
Since this is a fresh VM there should be no previous version of Docker and will see a 'Command docker not found' message.
Update the repositories and install the required packages:
$ sudo apt-get update
$ sudo apt-get install ca-certificates curl gnupg lsb-release
Adds Docker's official GPG Key:
$ curl -fsSL https://download.docker.com/linux/ubuntu/gpg | sudo gpg --dearmor -o /usr/share/keyrings/docker-archive-keyring.gpg
As your logged in as the home user and not as root - you will see the following error message - we can just ignore it for now - as this is not a production type setup we are performing.

Next we add a stable repository to download docker from, update the apt package index and then install the latest version of the Docker engine and containerd :
$ echo "deb [arch=$(dpkg --print-architecture) signed-by=/usr/share/keyrings/docker-archive-keyring.gpg] https://download.docker.com/linux/ubuntu $(lsb_release -cs) stable" | sudo tee /etc/apt/sources.list.d/docker.list > /dev/null
$ sudo apt-get update
$ sudo apt-get install docker-ce docker-ce-cli containerd.io
Hit 'Y' when it asks about disk space usage etc.
Once the installation completes, you can verify that the Docker Engine is intalled correctly by running the 'hello-world' docker image:
$ sudo docker run hello-world
You will see various download related messages followed by a ' Hello from Docker !' message - if so, Hurrah your Docker installation appears to be working correctly!
Step 3 - Installing docker-compose
We will be using a docker-compose.yml file to configure / orchestrate our RTC container - and for that we need to install the Docker Compose tool:
$ sudo apt install docker-compose
Just hit 'Y' if you are asked about disk space usage.
The installation of docker-compose should then be completed.
Step 4 - Managing Docker as a non-root user
As the Docker daemon binds to a Unix socket instead of a TCP port and by default, that Unix socket is owned by the user root - other users can only access it using sudo.
The Docker daemon always runs as the root user.
To avoid having to repeatedly preface the docker command with sudo, we can create a Unix group called docker and add users to it.
When the Docker daemon starts, it creates a Unix socket which is then accessible by members of the docker group
Use the following steps to create a Unix group called docker (which may already exist!), add users to it and activate the changes to the group membership:
$ sudo groupadd docker
$ sudo usermod -aG docker $USER
$ newgrp docker
Once you have executed the above, Log out and stop and start the rtc VM instance to allow the changes to take effect.
Once restarted, click SSH again to open a shell.
You can verify that the changes have worked by running e.g. the previous 'hello world' command without the use of sudo.
$ docker run hello-world
Step 5 - Replicating the rtc config directory structure
Referring back to my original article, you will note that in order to deploy RTC inside docker, I create a localhost directory structure, where I store and access my RTC config, log files and licence file – outside of the Docker container - which I then refer to in my docker-compose.yml file.
You could try and create the same directory structure and upload each file individually. However, if you have already deployed RTC locally, then the easiest way is to leverage the GCP Cloud Storage bucket functionality and then upload your local files into a bucket and then use the gsutils command to copy them into your rtc VM.
Assuming you already have the directory structure and files on your local PC, perform the following steps.
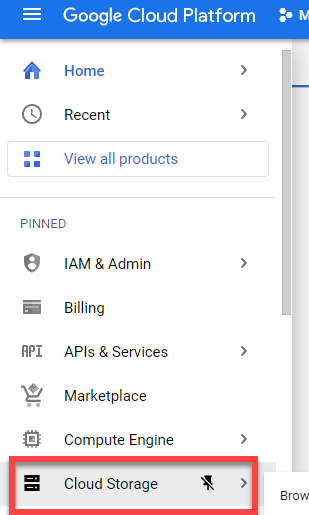
From the GCP console, navigate to the Cloud Storage section:
- Create a Storage bucket with a unique name - I called mine 'rtc353un'.
- Select a region closest to you
- Leave the remaining settings at their default values and click Create.
- Use the CREATE FOLDER option to create a log folder and debug folder
- Upload the config folder from your local PC into the root folder of the bucket
- Check the config folder contents to ensure the REFINITV_LICENSE and rtc.cnf files have been uploaded successfully
- Upload your local docker-compose.yml into the root of the bucket
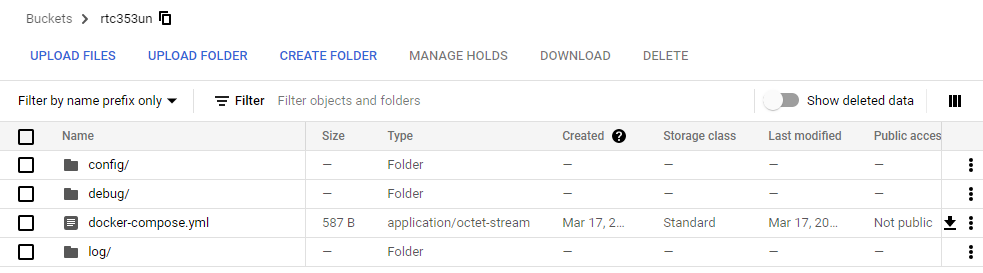
Your bucket contents should now look something like:
In your shell console, use the gsutils copy command to copy the directory structure and files from the bucket into your home directory - replacing rtc353un with your bucket name:
$ cd ~
$ gsutil cp -r gs://rtc353un/ .
$ cd rtc353un
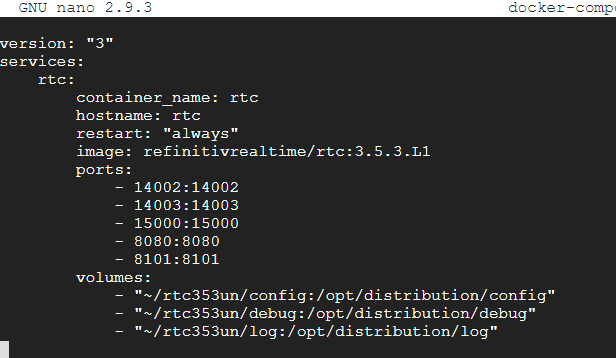
The previously uploaded docker-compose.yml will contain the volume binds for your local PC., so it needs to be edited to reflect the VM directory structure. You can do this using nano which should already be installed.
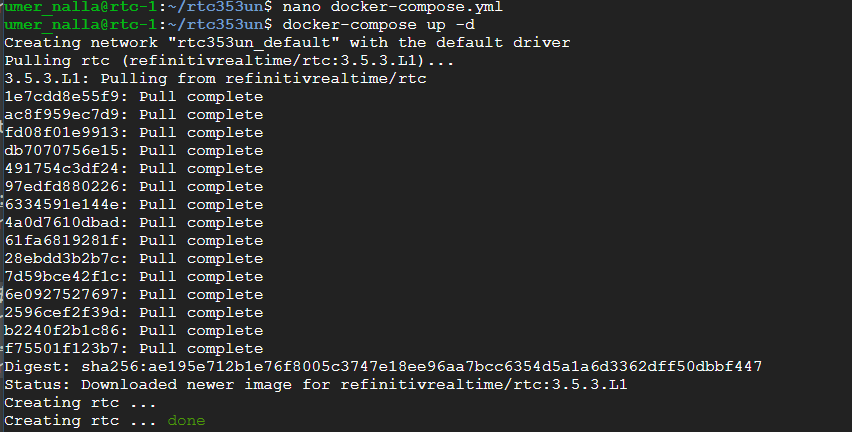
$ nano docker-compose.yml
When editing make sure the absolute directory address is used - otherwise you may see permission errors from docker. Once you have finished editing, save the yml file and exit nano.
We are now ready to run Docker Compose...
As mentioned in my original article, the following command creates and starts an RTC instance in detached mode – i.e., runs the container in the background.
$ docker-compose up -d
You can check if the RTC container is up and running by using the docker inspect and docker container ls commands:
$ docker inspect -f {{.State.Running}} rtc
$ docker container ls
If all is well,, you should see something like:

If the container is continously trying to start, then the chances are that it's a volume bind error - so back to the earlier step and recheck the docker-compose.yml file using nano.
You can also check the log files in real-time to see what the issue might be (replacing the hex Container ID with the output from the docker container ls command - as shown above):
$ docker logs --tail 50 --follow fcd2d75db70c
Assuming that RTC is up and running successfully, we can continue with the RT-SDK installation
Step 6 - Install the RT-SDK
First, we need to repeat some of the earlier steps - this time for the RT-SDK
- Step 1 - create a VM instance with Ubuntu Bionic 18.04 (LTS) and call it something like rt-sdk1
- Step 2 - install the Docker Engine
- Step 4 - perform the docker group steps so you can work as a non-root user
Once the above steps have been done, you need to pull the current RT-SDK Java image from Docker Hub:
$ docker pull refinitivapis/realtimesdk_java
Once the pull is complete we can then run the docker container in interactive mode as follow (where the hex Image ID is the one listed by the docker images command (see below):
$ docker images
$ docker run -it --name ace9fa744dc6 refinitivapis/realtimesdk_java

If you have previously started the container and its still running, you can connect to it using the docker exec command (where image ID is as shown above):
$ docker exec -it ace9fa744dc6 /bin/bash
Once you have the RT-SDK container running, you need to edit one of the examples to connect to and consume data from the rtc container which should still be running.
The simplest example that comes with the RT-SDK package is the example 100 for Market Price Streaming.
Change directory to the location of the example - so for example 100 it would be:
# cd /opt/refinitiv/Real-Time-SDK/Java/Ema/Examples/src/main/java/com/refinitiv/ema/examples/training/consumer/series100/ex100_MP_Streaming
Install an editor such as nano and then edit the example source code:
# yum install nano
# nano Consumer.Java
In the example source code, you will need to modify
- the server hostname/IP address
- the service name
- and the name of the RIC you want to subscribe to
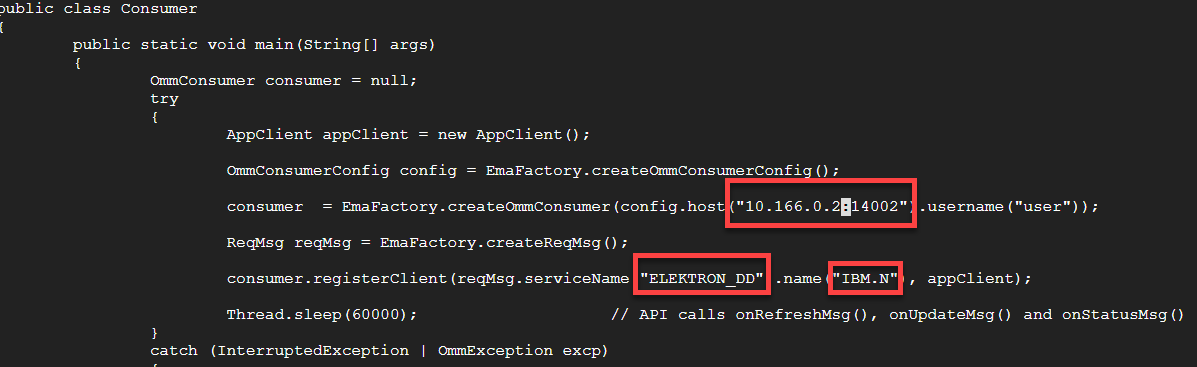
For the ex100_MP_Streaming example, you need to change
- the hostname to the IP address of your rtc VM
- the service name to ELEKTRON_DD
- you could also change the RIC from 'IBM.N' to another RIC of your choice e.g. 'EUR='
The easiest way to get the IP address for the RTC container is by clicking the 3 dots next to the rtc VM instance entry and selecting 'View network details'
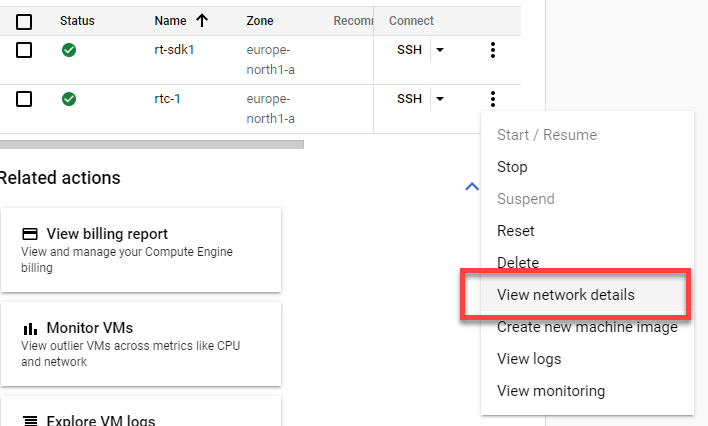

Copy the IP address and apply to the example source code, along with service name and RIC name as required.
In the ex100_MP_Streaming example, you can apply the changes in the main() method as shown below
Save the changes to the source code and then change your directory back to /opt/refinitiv/Real-Time-SDK/Java and then run the example.
For the ex100_MP_Streaming example you would perform the following:
# cd /opt/refinitiv/Real-Time-SDK/Java/
# ./gradlew runConsumer100
The first time you run gradle it takes a few moments - after a few moments, you should see streaming data for the RIC you specified in the source code:

Next Steps?
My colleague's initial objective was to get an RT-SDK Consumer application connecting to an RTC instance - both on the Google Cloud Platform - all on the same default network - with no dependencies on localhost installation.
As you will note, the steps outlined above successfully fulfil those objectives - in a relatively simple manner.
Part 2 of the original article which led to this has additional sections on running + testing Interactive and Non-Interactive Providers as well Posting functionality. Once you have moved beyond experimenting with the Consumer functionality/examples - you should be able to apply the other instructions from my article to this GCP deployment as well.
Finally, I would like to thank my colleague Douglas for documenting this process and allowing me to share it with the wider Refinitiv Developer community - thank you!