| Last update | June 2020 |
| Operating System | Any |
| Interpreter | Python 3.x |
Introduction
In this tutorial, we will write a Python sample, which will use Password or Refresh Grant to request the Access token. The sample will timestamp and store the tokens and other associated information in the file. Every time this sample is run, first it will try to read the token file, and if the file exists and contains a un-expired token, returns an Access token. The sample will request a new tokens if current token is not usable (i.e. does not exist or is expired).
Implementation
Refer to the file: rdpToken.py in the sample source code package, which can be downloaded here. This file contains two user method: getToken and changePassword, and an underlying implementation: _requestNewToken to get the token using REST API. This sample implements the raw HTTP REST interactions using the Python requests library. Users are free to choose other third party libraries, even the ones which implement complete OAuth 2.0 client specifications, thereby simplifying the application code.
Getting the token: getToken()
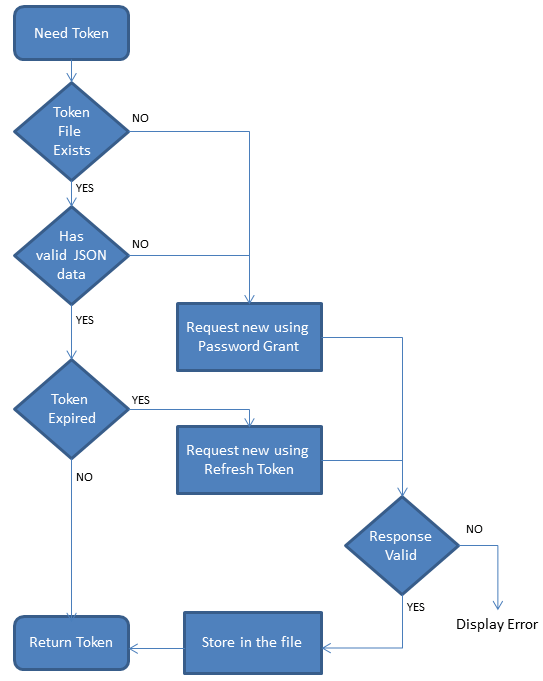
This method starts by trying to read the token file defined in variable: TOKEN_FILE. Following flow diagram is followed:
Make a REST call to platform
The following "requests" call is responsible for getting the tokens. When using Password Grant, these parameters will be carried in the HTTP body:
tData = {
"username": USERNAME,
"password": PASSWORD,
"grant_type": "password",
"scope": SCOPE,
"takeExclusiveSignOnControl": "true"
};
Here, tData is a JSON object, which will be marshaled as name/value pairs like: username=****&password=****&grant_type=password&scope=trapi&takeExclusiveSignOnControl=true
Similarly the JSON parameters if using Refresh Token are shown below. We don't need to send the password or define the token scope, since we are refreshing old tokens.
tData = {
"refresh_token": refreshToken,
"grant_type": "refresh_token",
};
Next, initiate the HTTP POST call, and send the above parameters in body:
response = requests.post(
TOKEN_ENDPOINT,
headers = {
"Accept": "application/json"
},
data = tData,
auth = (
CLIENT_ID,
CLIENT_SECRET
)
)
Here, we are sending the POST data to the predefined token endpoint with previously defined body parameters. Setting CLIENT_ID as an auth variable, will send it as base64 encoded parameter in the "Authorization" header.
If all went well, the server will respond with a HTTP status code of 200 response.status_code == 200, and the token information can be read from response body, and parsed as a JSON object json.loads(response.text). Any status code other than 200, will indicate that an error has occurred, in which case the response body will contain an error code and message.
Store the token
If the previous token route was successful, the tokens should be stored in file or database:
tf = open(TOKEN_FILE, "w");
# append the expiry time to token
tknObject["expiry_tm"] = time.time() + int(tknObject["expires_in"]) - 10;
# store it in the file
json.dump(tknObject, tf, indent=4)
Since the token expiry time is provided in seconds since it is generated, the example code timestamps the file with local machine time. Any request to get Access token after this expiry time, will result in requesting a new one, using Refresh grant.
In next tutorial, we will use this Access token to get timeseries data from RDP.
Run
Modify the file rdpToken.py and update the USERNAME, PASSWORD and CLIENT_ID variables, defined at the begining of the file.
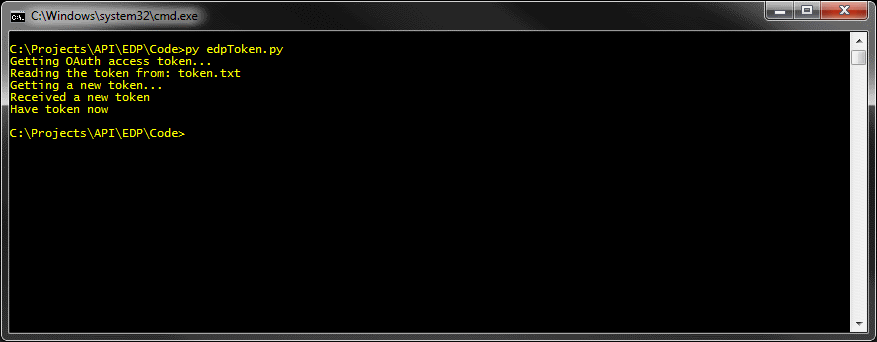
Execute the sample from command line using command:
py rdpToken.py
You should see the following output upon successful run: