Refinitiv Data Library for TypeScript
Getting started with Refinitiv Data Library for TypeScript
| Example Source Code |
Examples referenced: 1.QuickStart\testSession.ts Misc\LocalRTDS.ts |
| Last Update | March 2022 |
| Compiler/Runtime | NodeJS version 10.x or higher, Typescript version 4.2 or higher |
| Prerequisites |
If accessing content from: Desktop (Eikon 4.0.36 or greater / Refinitiv Workspace 1.8 or greater) Deployed Environment (ADS 3.2 or greater) |
The goal of this Getting Started tutorial is to provide the TypeScript developer the steps required to prepare an environment to access content within the Refinitiv Data Platform. The Refinitiv Data Library is designed as an ease-of-use interface allowing the developer simple access to content from multiple supporting access points. That is, they can choose to access content directly within the cloud, access from the desktop through either Eikon or Refinitiv Workspace desktop or via a locally deployed enterprise streaming installation (ADS).
This quick start guide will provide the steps to set up and configure the example package necessary to access the content.
Setup the build environment
Download and install nodejs and the npm node package manager from https://nodejs.org.
2. Download and uncompress the latest TypeScript tutorials. The download package contains the /src directory with all the tutorial source code and a couple of configuration files. These files are:
| tsconfig.json | This file instructs the TypeScript compiler on how to compile the sources. It specifies the input source and output directory and has common switches required for use with provided sample source. |
| rdplibconfig.prod.json | Configures the Refinitiv TS library logging and other options. In this sample, we have changed the logging level to WARNING and disabled the file logging and enabled the console logging. More library options can be configured in this file - see documentation for all available options. |
| session.config.json | This json file contains the user credentials for use with tutorial source code. See access credentials for what type of credentials are needed for various platforms. In the provided sample, we have configured the platform to be the default source for samples. |
| .vscode\launch.json | This file configures the Visual Studio Code to use ts-node for compiling and debugging tutorial samples. |
| /src | This directory contains all the tutorial TypeScript source code files in subdirectories which are ordered by numbers. |
Except for session.config.json, all the configuration files are optional and may/may not be used in your setup.
3. Open a command prompt and follow the instructions below to install the Refinitiv Data Library for TypeScript in this new directory. Ensure that your directory name does not have spaces in it. The following instructions assume that tutorials were uncompressed into a Tutorials directory:
cd Tutorials
# Create an blank node project
# Press <enter> to accept all default options
npm init
# Install Refinitiv TypeScript libraries
npm install @refinitiv-data/data
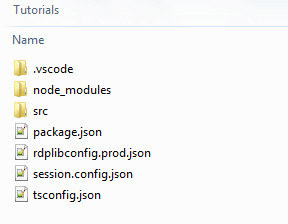
The final directory with complete setup will look like this -
Compile and Run
There are three ways in which a user can use the TypeScript tutorial source code.
First option is to use TypeScript compiler to compile the *.ts files into corresponding JavaScript files which can then be executed using the nodejs runtime. This approach is most applicable for a production application.
Second option is to use ts-node, which is a TypeScript execution engine for nodejs, and allows direct interpretation of TypeScript source code without compiling it first. This is helpful during the development phase as compiling and running is taken care of in a single step.
Third option is a variation of second one, and uses ts-node integration with Visual Studio Code. The VSCode IDE allows a user to set breakpoints and inspect variable values, hence allowing for an easier development experience. The setup process for these options is explained below. We recommend that new users choose Option 3: Using Visual Studio Code.
Prerequisite: Set your credentials
Edit the session.config.json file and type in your access credentials. See Testing your Credentials more details.
Option 1: Using vanilla nodejs/ts compiler
Install the TypeScript compiler using following commands in the samples directory:
# install tsc compiler locally in the project directory
npm install -D typescript
# or optionally install tsc compiler globally
npm install -g typescript
The sample tsconfig.json json file contains the switches required for samples. To compile the samples open a command prompt in this directory and run the compiler using command -
tsc
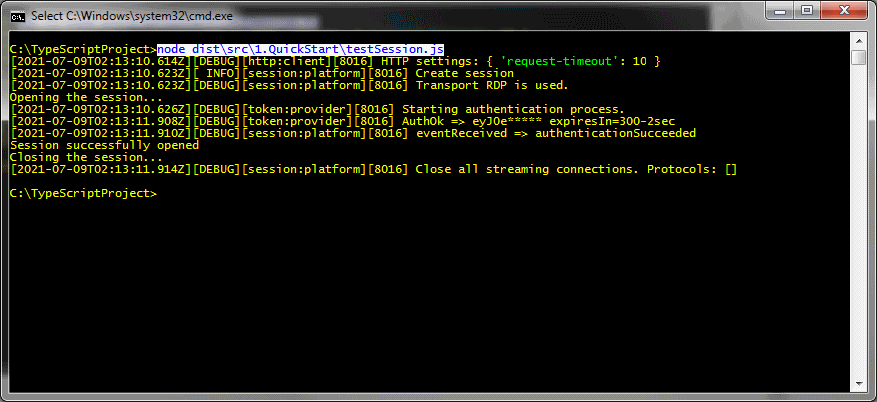
The compiled JavaScript files and the session.config.json file is put into the /dist directory, and can now be executed using the nodejs runtime (Set your credentials first - see Testing your Credentials):
# run the compiled JavaScript file with node
node dist\src\1.QuickStart\testSession.js
Option 2: Using ts-node interpretor
ts-node is a TypeScript execution engine, and can be installed using npm. In the samples directory issue the following commands:
npm install -D typescript
npm install -D ts-node
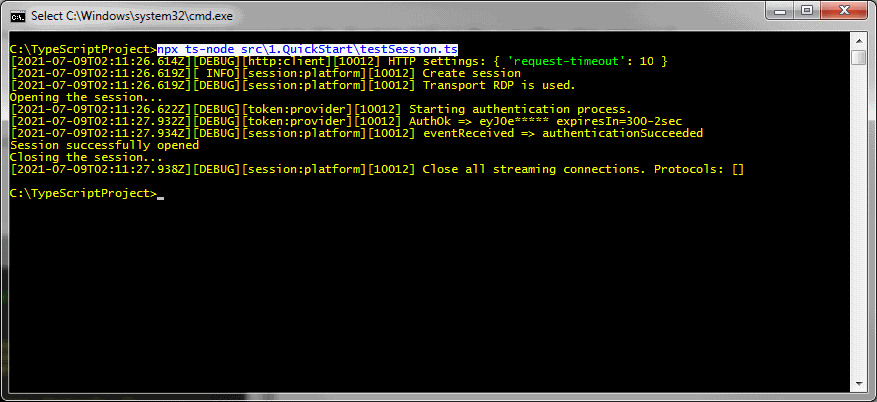
Now, to run a sample TypeScript file, use the syntax (Set your credentials first - see Testing your Credentials):
# compile and run the TypeScript source file with ts-node
npx ts-node src\1.QuickStart\testSession..ts
Option 3: Using Visual Studio Code
Once the Visual Studio Code is installed on the machine, follow the steps in Option #2 above to install the ts-node. The .vscode\launch.json configuration file provided in the download package, automatically instructs the Visual Studio Code on how to handle Run/Debugging the tutorial files.
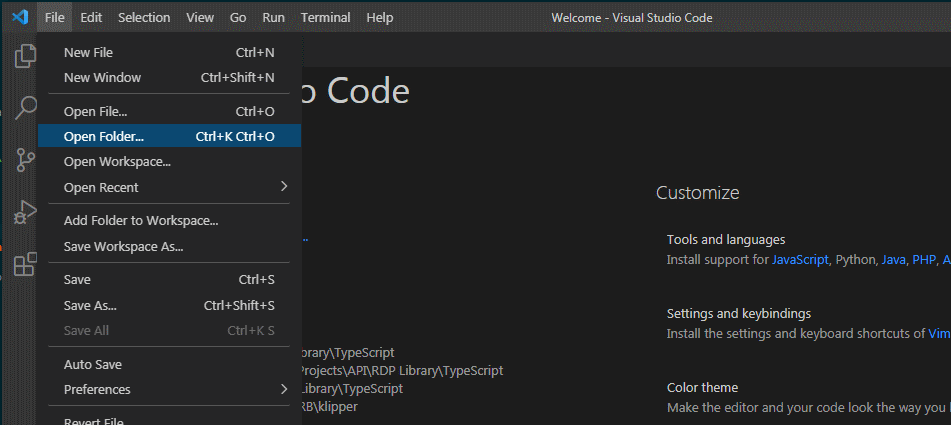
- Launch the Visual Studio Code
- Choose Open Folder menu item
3. Choose the root folder where all the above mentioned files are available.
4. Open the QuickStart source file
5. Press F5 or select Run from the menu (Set your credentials first - see Testing your Credentials)
Testing your Credentials
At this point, the build environment should be successfully setup. We need to instruct the TS library to connect to the correct data system like platform, desktop or container, and use the credentials for that particular system. See access credentials about the details on what these data systems are. The tutorial sample code relies on a single configuration file session.config.json, which has following structure:
{
"sessions": {
"default": "platform",
"platform": {
"rdpUser": "<RDP Machine ID>",
"rdpPassword": "<RDP Password>",
"appKey": "<RDP Application Key>"
},
"desktop": {
"appKey": "<Desktop Application Key>"
},
"container": {
"appKey": "<Application Key>"
}
}
}
Edit this file, and type in your credentials for the relevant system that you will be testing. Also, modify the default session key - session/default value to the name of this system. For example, for a desktop user, the value will be:
{
"sessions": {
"default": "desktop",
along with the Desktop Application Key.
Once the above configuration changes have been made in the code, the session type does not have to be explicitly specified in the code and can be left blank as shown below (src\QuickStart\testSession.ts):

Once this configuration is complete, now the QuickStart\testSession.ts file can be executed using one of the three options mentioned above. Note that if using build option #1, tsc compiler, the session.config.json file is also copied into the /dest directory. So ensure that you are modifying the one in the root folder, and invoking the tsc afterwards to copy the modified file over.
Sourcing data from Local Market Data System
The sample Misc\LocalRTDS.ts shows how to get streaming pricing data from the local market data system. Only realtime streaming data is supported when connecting to an on-premesis Refinitiv Market Data Distribution System. Configure the platform session as shown and provide a valid host name for your local endpoint (formarly ADS). The port for websocket delivery is typically 15000. Please note, that an appKey is a required parameter, but it is not used yet. Your organization market data administrator can provide the endpoint information like hostm DACS username etc.
// create a session to connect to the local market data system
const session = Session.Platform.Definition({
appKey: 'NOT_USED',
host: 'ADS_HOSTNAME_OR_IP_ADDRESS:15000',
dacs: {
userName: 'MyDACSUserID',
applicationId: '255',
position: '127.0.0.1/MY_PC'
}
}).getSession();
Troubleshooting
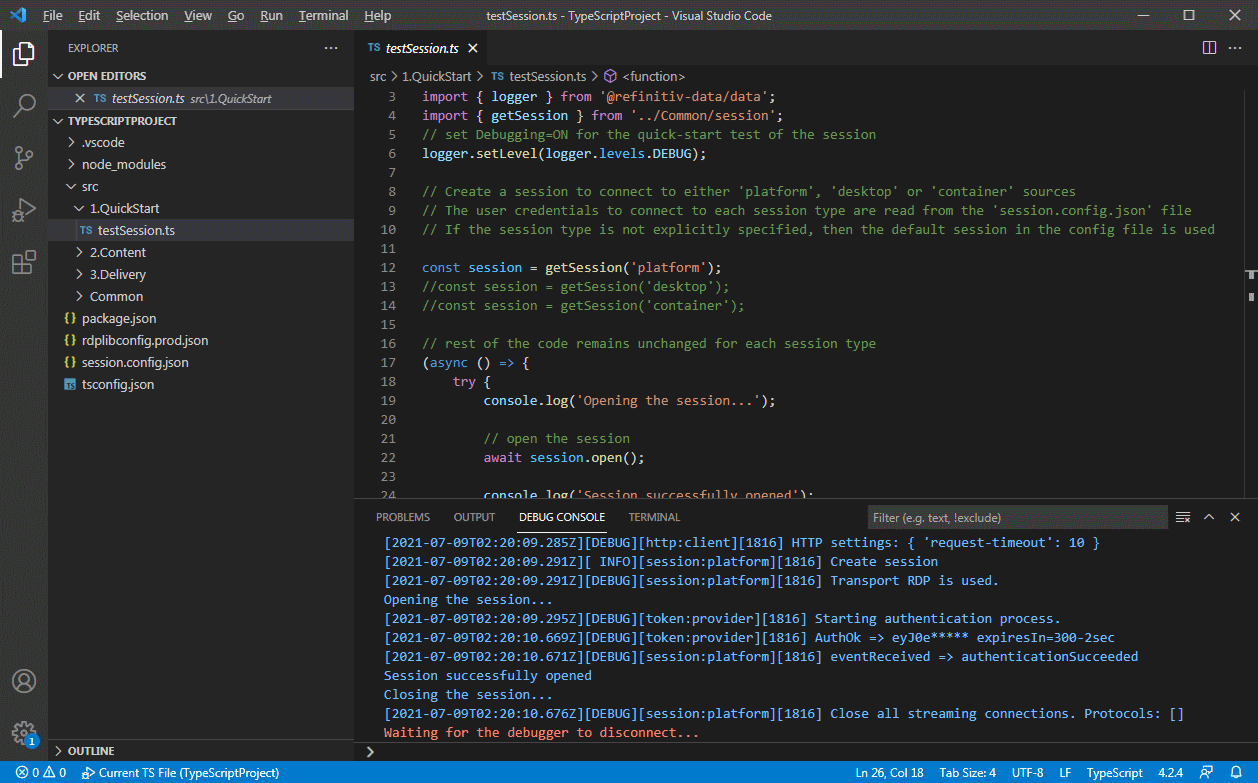
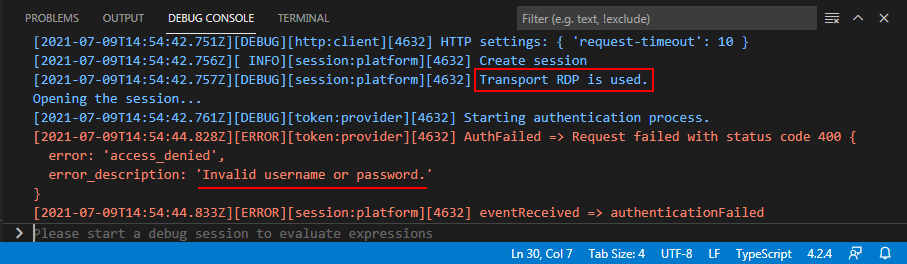
The QuickStart\testSession.ts configures the logging level to DEBUG to allow for verbose output messages. A failure to connect to the data system might happen primarily due to two reasons:
1. Invalid access credentials: Ensure that you have entered the credentials in the right place and they are ones which you received from Refinitiv. The debug output clearly shows which type of data-system you are trying to connect to. If the credentials are incorrect, this reason is also displayed in the error messages as shown:
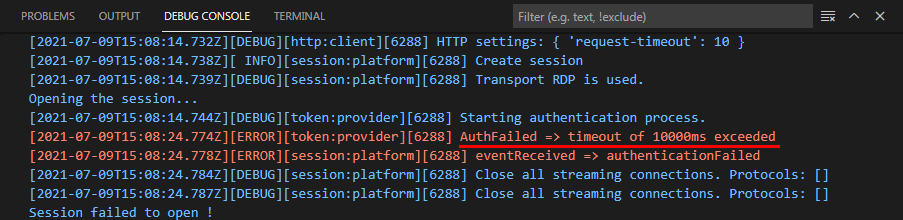
2. Networking and firewall issues: Please contact your network admin to resolve this. You may have to allow firewalls to allow the connections through. The error message may include the keyword like timeout or a port number in the debug log:
Next Steps
Once credentials have been verified, feel free to work through the tutorials to better understand the capabilities and power of the Refinitiv Data Library.