| Example Source Code |
Github files referenced: |
| Last Update | July 2021 |
| Interpreter | Python 3.7.x or greater |
| Prerequisites | Familiarity with Python and a basic understanding of Jupyter Notebook. If accessing content from:
The majority of the examples are built to work within Jupyter Notebook. Ensure this package is installed. |
The goal of this Getting Started tutorial is to provide the Python developer with the steps required to prepare a development environment to access content within the Refinitiv Data Platform. As outlined within the Refinitiv Data Library for Python - Reference Guide, the libraries are designed as ease-of-use interfaces, available in multiple programming languages, allowing the developer a consistent way to access content from multiple supporting access points. That is, they can choose to access content from either the Eikon or Refinitiv Workspace desktop, directly to the cloud (Refinitiv Data Platform/Real-time Optimized) or via a locally deployed enterprise installation (RTDS/ADS).
This quick start guide will provide the steps to set up and configure the Python Jupyter Notebook example package necessary to access the content.
Install the Refinitiv Data Library for Python
Run the following command to install the library package from the Python Package Index at PyPi refinitiv-data :
> pip install refinitiv.data
Configure and run examples
The Refinitiv Data Platform provides a number of data services such as streaming, request/reply, alerts and bulk files. Depending on your specific requirements, an example package will be available for you to verify access. The downloadable example package will provide a series of examples that will cover specific capabilities that will support a cross-section of the services within the platform.
After downloading and extracting the Python Examples , start your Jupyter Notebook and load the package:
> jupyter notebook

The package will present examples within Quick Start and Tutorials folders. Prior to running any example, you will need to define your credentials in order to access the content.
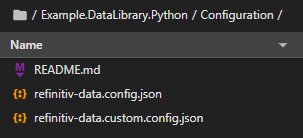
Before assigning your access credentials within the Configuration/refinitiv-data.config.json file included within the example package, ensure you have reviewed the Access Credentials Guide.
NOTE: Do NOT modify the internal configuration file that is installed with the library (e.g in the site-packages\refinitiv\data folder) - modify your own local copy - i.e the one in the Configuration folder of the Examples package (or your choice of directory - when you start writing your own code).
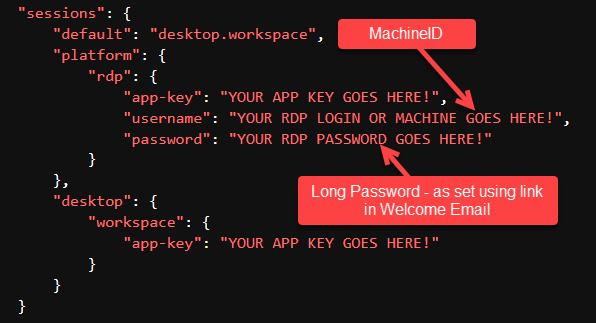
In the Credentials file, you need to set your AppKey regardless of which Session (connection type) you intend to use.
- If you will be connecting to the Refinitiv Data Platform, then you also need to set the RDP_LOGIN and RDP_PASSWORD
- For a Deployed (ADS) connection, you need to provide the hostname:port of the ADS as well as a Dacs Username
- For a Desktop (Eikon/Workspace) connection, only the above AppKey is required
(see the Access Credentials Guide for further details)
Default Session
In the refinitiv-data.config file you can specify a default session, so that whenever you call rd.open_session() without any parameters, the RD library will attempt to open that session.
For example, in the config below, I have specified the 'desktop' session named 'workspace' as the default. So, when rd.open_session() is called, the 'AppKey' in that section will be used to create a Desktop Session.
If you are not connecting to a desktop product (Eikon or Refinitiv Workspace) and connecting for example, to the Refinitiv Data Platform - then you would set your default to "platform.rdp" to use your RDP credentials instead.
"sessions": {
"default": "desktop.workspace",
"platform": {
"rdp": {
"app-key": "YOUR APP KEY GOES HERE!",
"username": "YOUR RDP LOGIN OR MACHINE GOES HERE!",
"password": "YOUR RDP PASSWORD GOES HERE!"
},
"deployed": {
"app-key": "YOUR APP KEY GOES HERE!",
"realtime-distribution-system": {
"url" : "ws://YOUR DEPLOYED HOST:PORT GOES HERE!",
"dacs" : {
"username" : "YOUR DACS ID GOES HERE!",
"application-id" : 256,
"position" : ""
}
}
}
},
"desktop": {
"workspace": {
"app-key": "YOUR APP KEY GOES HERE!"
}
}
}
NOTE: If you are using a Deployed server (e.g. ADS) you will need to provide:
- the server's hostname and Websocket API Port e.g. 'ws://ADS1:15000' - where ADS1 is your server's hostname
- your DACS ID e.g. 'umer.nalla'
- optionally you can also specify an Application ID - default 256
Also, you must bear in mind that at present, a Deployed connection can only deliver real-time data - so most of the other tutorials and examples provided such as historical data, symbology, news etc will not return any data - when used with a Deployed session.
Define a session using your own credentials store
Alternatively, if you do not wish to use a refinitiv-data config file, you can define sessions by specifying the parameters and session type explicitly. Sessions can be created by explicitly passing in your credentials/connectivity parameters as shown further down in the QS_1.0 - Sessions notebook.
The most immediate choice may be to hardcode the credentials into your notebook or script. However, this risks accidentally exposing your credentials when sharing your code with others. Therefore, Instead of putting your credentials in the notebook file, one option could be to use a standalone .env file as demonstrated in the QS_1.0 - Sessions notebook (a sample .env is also included on Github in the Quick Start folder).
Testing your credentials
Once the config file has been populated, select the QS_1.0 - Sessions notebook in the Quick Start folder.
Note: If you choose to access content using a Desktop connection within the selected example, the Eikon or Refinitiv Workspace application must be running. When launched, the Eikon or Refinitiv Workspace application starts listening for local connections on port 9000 or the next available port if port 9000 is already occupied.
- Load the tutorial within Jupyter (or other IDE)
- Step through the code - executing the relevant code cells as per your credentials i.e. Desktop, Platform or Deployed
When you execute the rd.open_session() cell, you should see output such as:
<refinitiv.data.session.Definition object at 0x2a1fc4b9e80 {name='workspace'}>
Troubleshooting
If you do not see above or see State: Closed, or some other error the most likely cause of failure would be:
- The details you provided within the refinitiv-data.config.json file may be incorrect
- or for a Desktop Session, your Eikon or Workspace is not running on the same PC
If you have confirmed that the above scenarios do not apply, you can help diagnose the issue, by editing the refinitiv-data.config.json file and enabling either console or file logs and then running the steps again.
"logs": {
"level": "debug",
"transports": {
"console": {
"enabled": true
},
"file": {
"enabled": false,
"name": "refinitiv-data-lib.log"
}
}
In the above example, I have enabled console logging - to log directly into the notebook cell - you can use the file option instead if preferred.
You can then copy the console log output / log file and share that with the Refinitiv Support team (or post on the Q&A Forum - after removing any credential information)
Next Steps
Once access to the platform has been verified, we recommend you work through the tutorials to better understand the capabilities and power of the Refinitiv Data Platform Libraries.
In addition to these tutorials, you can also refer to the additional examples on GitHub